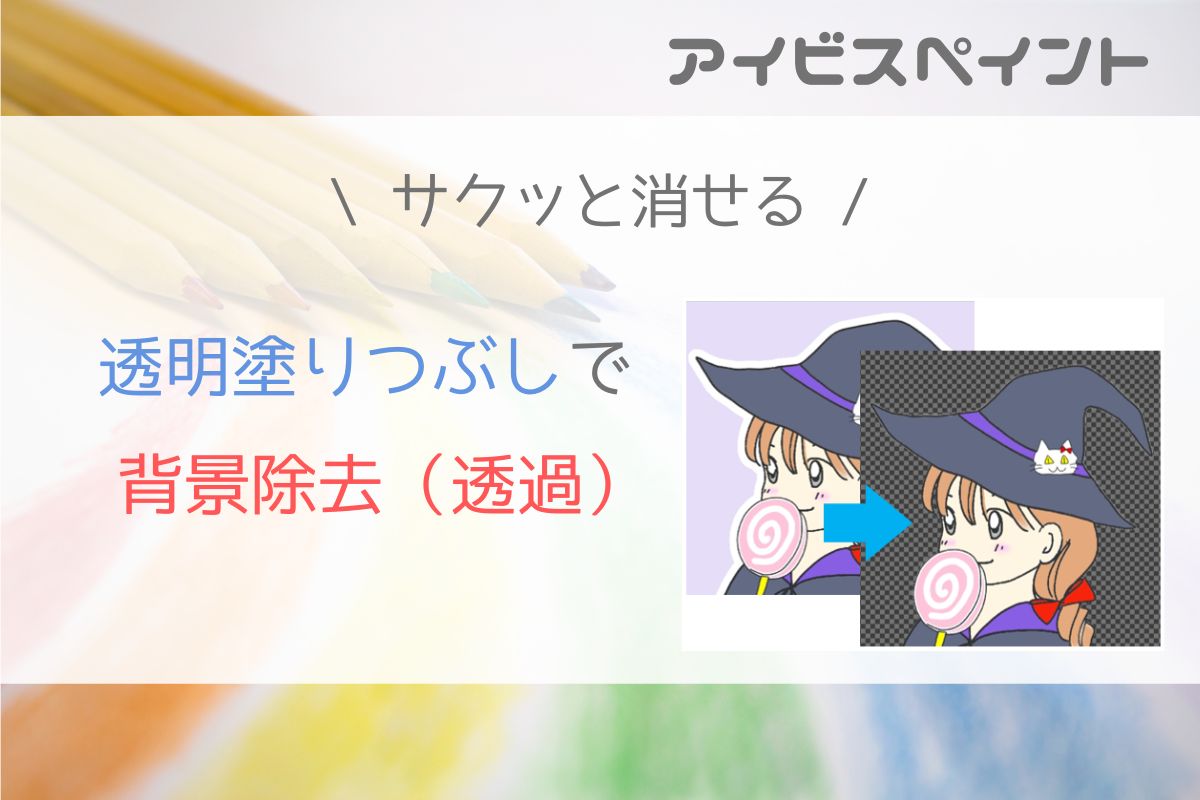
アイビスペイントの塗りつぶしツールに「透明塗りつぶし」という機能があるのはご存じですか?
文字通り透明に塗りつぶす=透過する機能で、背景を除去してキャラクターを切り出したいときなどに便利な機能です。
本記事では「透明塗りつぶし」の使い方をご紹介します。
こんな時に便利

・読み込んだ写真やイラストの背景を取り除きたい。
・イラストの一部分を切り抜いて透過させたい。
目次
透明塗りつぶしで背景を除去する方法
消しゴムとの違い
- 消しゴム
触れた部分だけ消す - 透明塗りつぶし
タップした部分を基準に、設定した色差と拡張の範囲を消す
消したい範囲が小さく点在していたりピクセル単位の繊細な作業は消しゴム、範囲が広くざっくり消したい場合は透明塗りつぶしが向いています。
透明塗りつぶしの操作手順
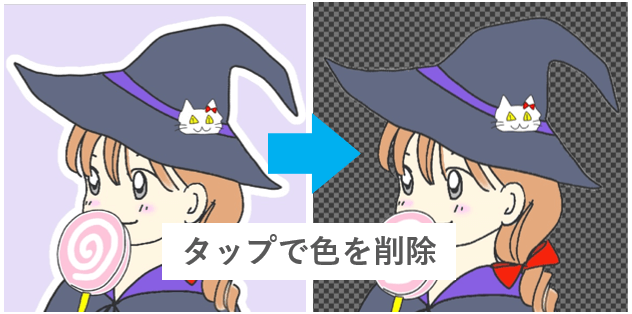
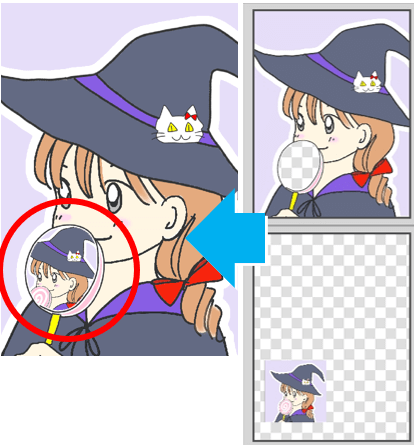
背景除去
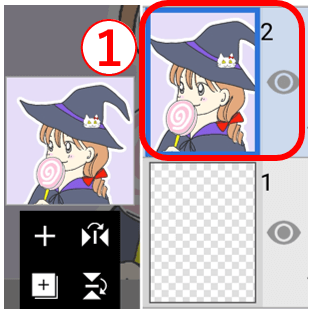
①背景を除去したい画像を読み込みレイヤーを選択

②通常の塗りつぶしツールを選択
③バケツマーク右の消しゴムマークをタップ
④設定を確認
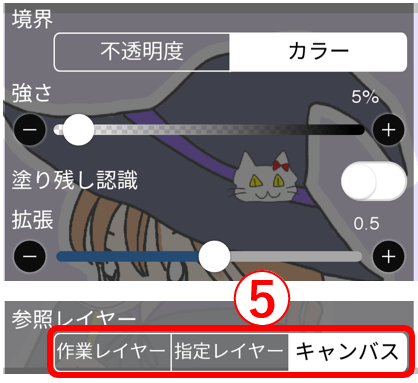
⑤除去したい範囲に応じて設定を変更し参照レイヤーを選択
※設定項目は塗りつぶしと同じです。今回の例では初期設定のまま進めています。
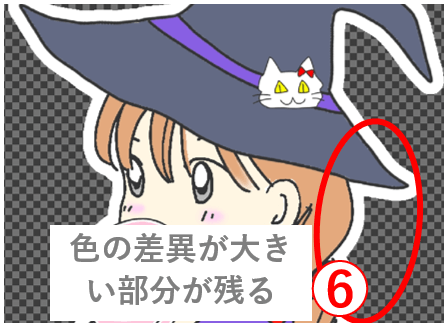
⑥背景をタップ
➡紫と白の色差が大きいため白い部分が残った
➡白い部分をタップで消す
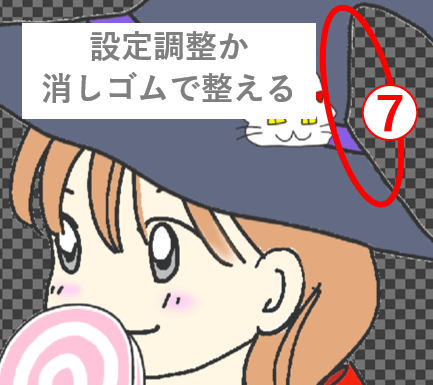
⑦白い部分も消えたが輪郭線の外側にわずかな色残り
➡拡張を少し上げてやり直すか消しゴムできれいに整える
背景除去完了です!
後は背景を付け直したり、透過保存してキャラクターを他で使ったりと自由に加工してください。
部分透過で遊ぶ
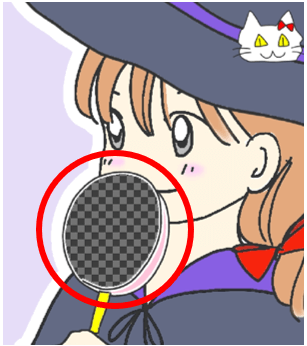
画像の様にキャンディーの内側をタップで塗りつぶすと、次の画像のように直下レイヤーを映して遊ぶことができます。
下の関連記事でお伝えしている2つの切り抜き方法よりも簡単でレイヤーが少なく済む一方、デメリットもあります。
✅設定次第で切り残し(塗り残し)や切り取り過ぎが生じる
✅イラストを直接加工するため適宜事前に複製を作る必要がある
以上、透明塗りつぶしの使い方でした。
アイデア次第で色んな使い方ができるので頭の片隅に置いといてください✨